A job is one service of process: the papers, the person to serve, where to find them, and who will do the serve. This guide walks you through the six steps of the Create New Job wizard. Free includes up to 25 assigned jobs per month.
Our example job: Hollywood v. Chris Kringle
To keep things friendly, the screenshots use a silly, made-up job. Nobody is really being served.
| Field | Sample value |
|---|---|
| Plaintiff | Hollywood (sample) |
| Defendant and person to serve | Chris Kringle (sample) |
| Case number | TEST-REVIEW-001 (sample) |
| Service address | 100 Example Lane, Exampleville, CA 90001 (made-up address) |
| Documents | Summons and Complaint (sample PDF marked TEST ONLY) |
> Sample only: Every name, address, document, and photo in this guide is fictional and used for training. Santa will not be getting a summons.
What you need before you start
- The documents to be served, as a PDF (up to 25 MB)
- Your customer's name, or the company you are doing the job for
- The name and address of the person to be served
- Any supporting files, such as a photo of the person to be served (optional)
Start a new job
- Sign in at mightyprocessserver.com/auth/login.
- Click My Jobs in the left menu. Your jobs are listed here, with tabs such as All Jobs, Drafts, Pending, Assigned, Affidavit, and Completed.
- Click Create Job. The Create New Job page opens with six steps down the left side: Upload Documents, Customer & Payment, Court Details, Servee & Service, Review & Verify, and Assign Server.
> Tip: Your work saves as you go. From step 3 on, you will see Saving... and then Saved at the top of the screen, and you can click Save Draft at the top right any time.
Step 1: Upload Documents
- Leave MightyAI Assist turned on. It reads your documents and fills in case and court details for you.
- Under Documents to Be Served, click Select Files or drag your file into the box. This box takes PDF files only, up to 25 MB.
- Wait for the file to change from Analyzing... to Extracted.
- Under Miscellaneous Documents, add any supporting files you want attached to the job, such as field sheets, court minutes, or a photo. This box takes PDF, JPG, PNG, DOC, or DOCX files up to 25 MB. These files are not included in the documents sent for service.
- Click Continue.
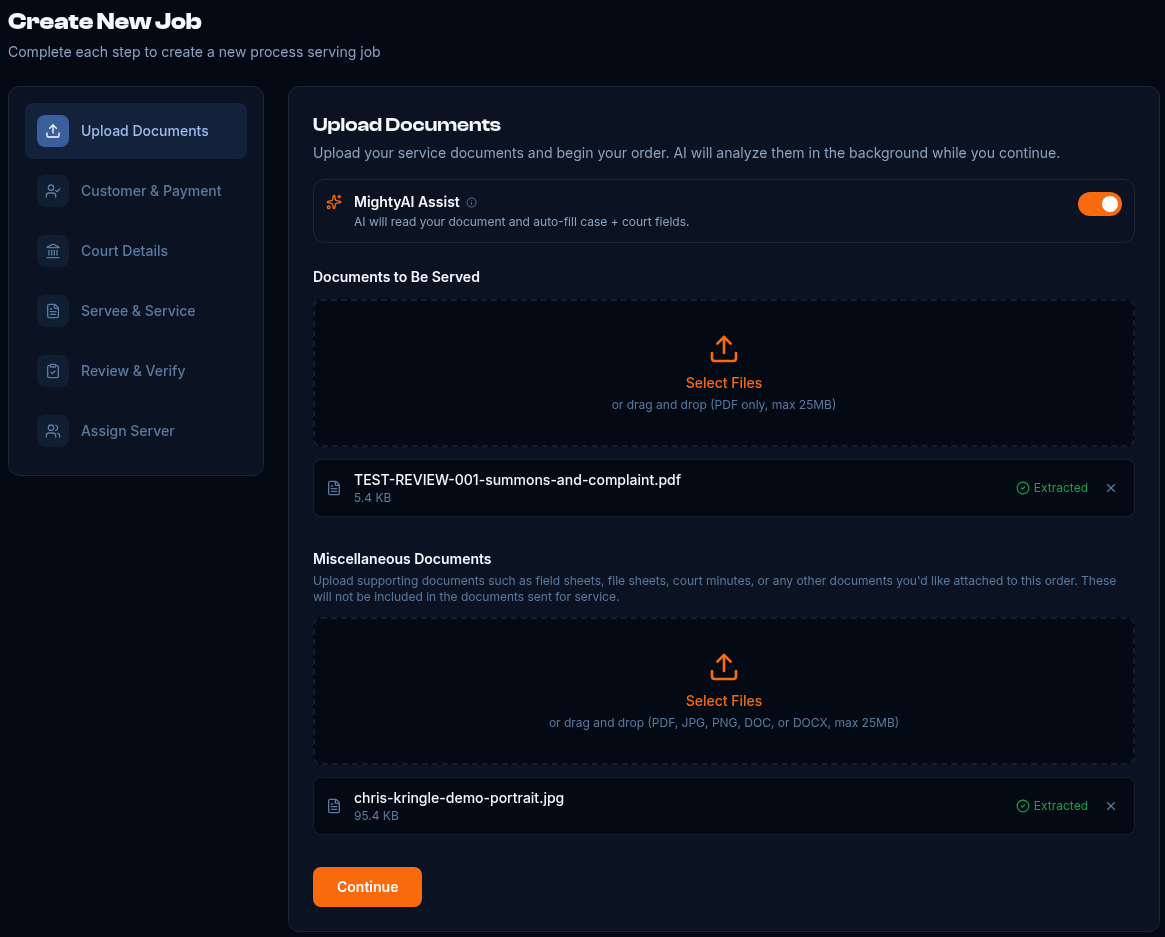
Step 1 with the sample Hollywood v. Chris Kringle documents uploaded.
Step 2: Customer & Payment
- Under Company Name, start typing to search your existing customers and pick one from the list. If the customer is new, type the name. New customers are created automatically.
- Enter the Contact First Name and Contact Last Name.
- Add the customer's Email and Phone if you have them.
- Add a Client Reference # if your customer uses a file or matter number. This is optional.
- Payment Received is optional. If you have already been paid, enter the Amount Received and a Payment Reference such as a check number or invoice number.
- Estimated Pay to Server is shown as the estimated pay on the Bid Board.
- Click Continue.
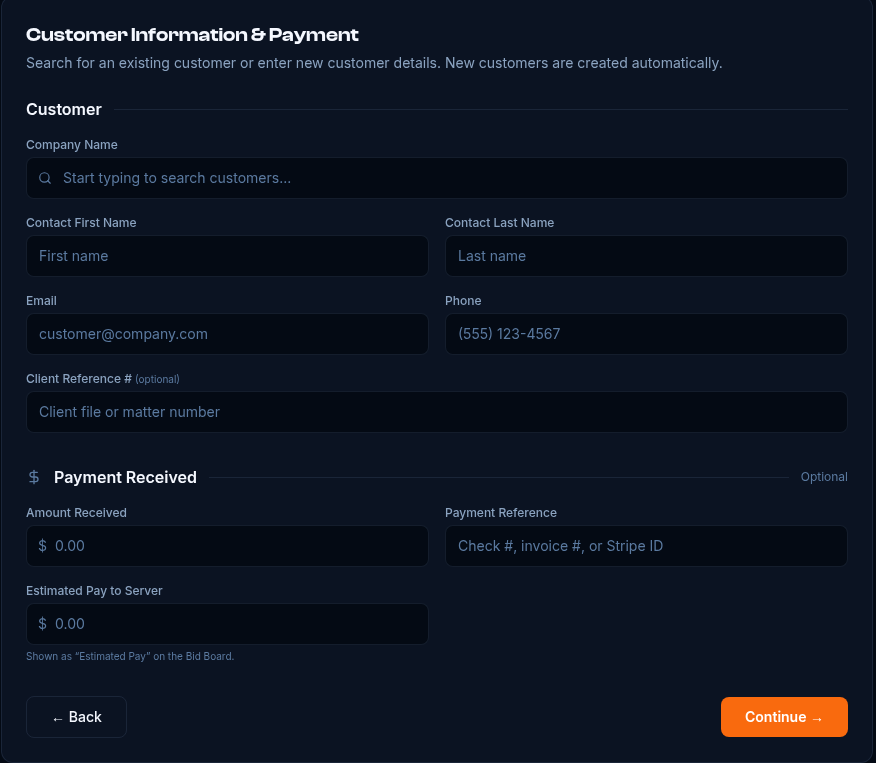
Step 2: who the job is for, and any payment already received.
Step 3: Court Details
From here on, your document opens on the left and the form is on the right, so you can check each detail against the papers.
- Under Document Names, check the names MightyAI found, such as Summons and Complaint. Drag them to reorder. This order is used on the field sheet and affidavit. Click Add document name to add one.
- Under Case Details, check the Case Number, Plaintiff(s), and Defendant(s). Add the Date Filed and Court Date if they apply.
- Under Case Location, search for the courthouse or check the Court Name, County, and Division. Add the Courthouse Address, City, Country, State, and Zip if you have them.
- Click Continue.
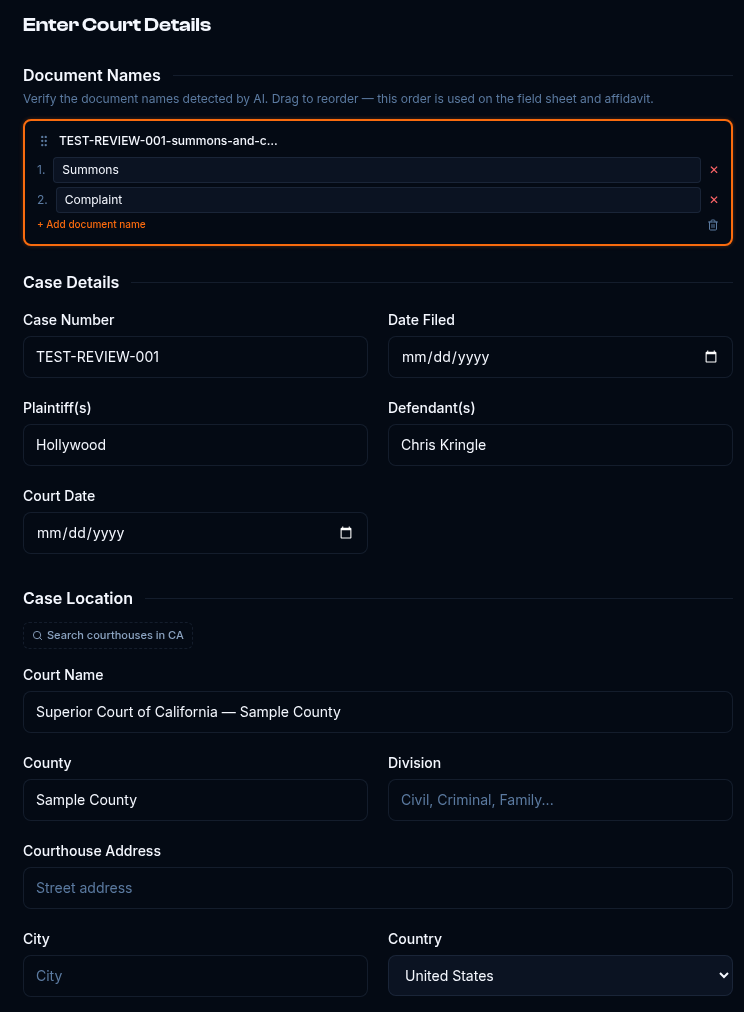
Step 3: MightyAI filled in the sample case number, parties, and court.
Step 4: Servee & Service
- Under Party to Be Served, check the Servee Name (last name, first name, middle name), Country, Service Address, City, State, ZIP Code, and County.
- Under Identification, you can add a Photo of Servee and a Brief Description to help the server recognize the person. This section is optional.
- Under Service Details, pick a Priority: Standard (every 72 hours), Priority (every 48 hours), Urgent (every 24 hours), or On-Demand (ASAP). Standard is selected by default.
- Type any Service Instructions for the server. Click Insert Saved Instructions to reuse text you saved before, or Save as Template to save these instructions for next time.
- Set a Due Date if the job has one. This is optional and must be set by hand.
- Click Continue.
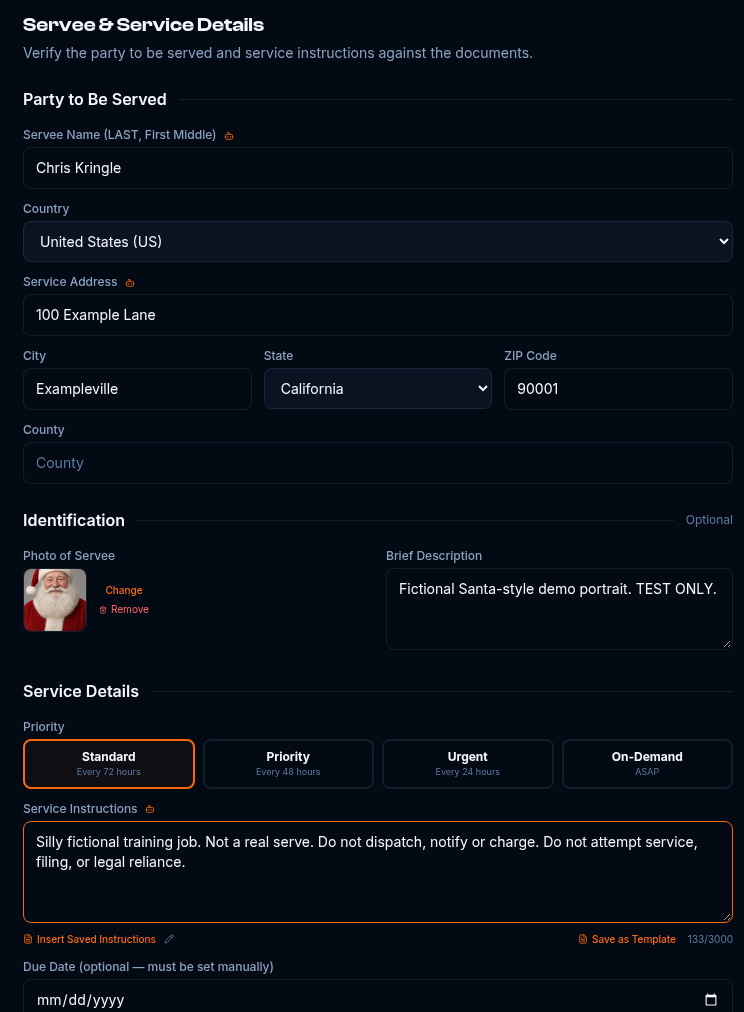
Step 4: the sample servee, a fictional photo, and the priority choices.
Step 5: Review & Verify
- Read through the summary of the Customer, Servee Information, Case Details, Documents, and Service. Click the pencil icon on any field to edit it, and check it against the documents on the left.
- Look at Recommended Proof of Service Forms. Based on your documents, Mighty Process Server lists forms that may be needed for this job, with recommended forms first.
- If you already know which affidavit you will use, click Select next to it. It will be preselected when the job is completed and the Affidavit Generator is opened. This is optional. Every saved template stays available later.
- Click Assign Server.
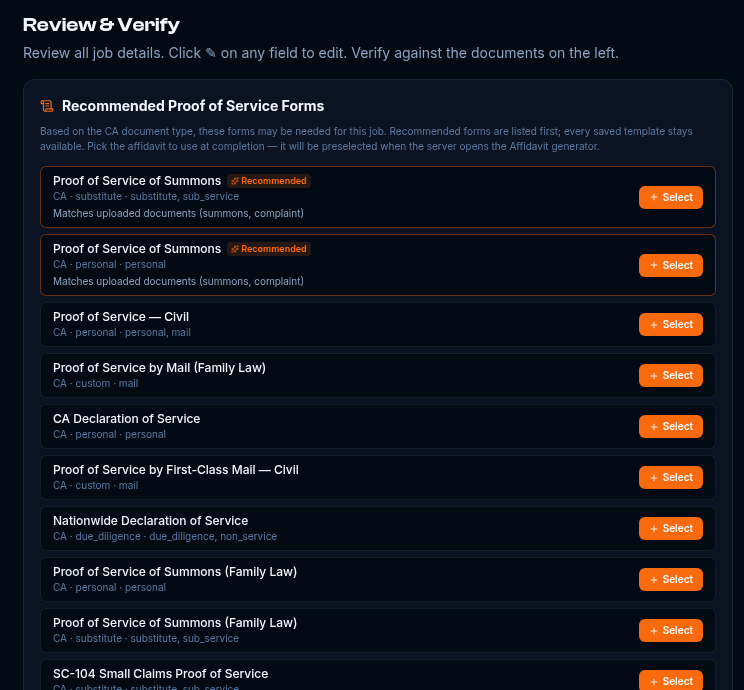
Step 5: review the job and, if you like, pick the affidavit form now.
Step 6: Assign Server
This is where you decide who will serve the papers. You have three general ways to get a job served:
- Hire a private server. Bring in a process server you work with directly.
- Use a favorite server. Send the job to a server you have saved and trust.
- Choose a server from the directory. Find a server near the service address in the Mighty Process Server directory.
On the Assign Server screen you will see these cards:
- Pending: selected by default. Leave the job pending if you want to create it now and assign it later.
- Assign to me: pick this if you will serve the job yourself.
- Search Directory: invite nearby servers to bid. This card is marked PRO, so it needs a Premium plan.
Choose a card, then click Create Job.
> Plan note: Inviting saved servers and directory servers to your jobs is part of Premium. On Free, you can leave a job pending or assign it to yourself. See Pricing for details.
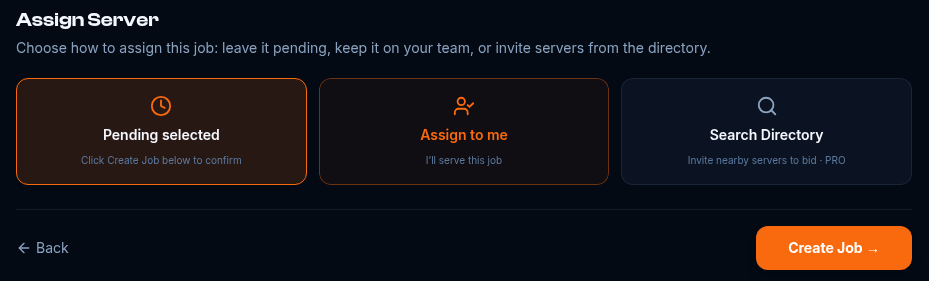
Step 6: choose how to assign the job, then click Create Job.
After you create the job
Your new job opens on its own page. You will see the job ID, the status (for example Pending Dispatch and Pending Assignment if no server is assigned yet), the customer, the party to serve, any photo you added, and the service address.
From the job page you can:
- Assign the job later. Under Managed By, click Assign to me. Under Field Agent or Process Server, you will also see My Servers and Search the Directory. These are locked on Free.
- Use the Job Timeline buttons to add a Note, log an Attempt, print a Field Sheet, or open the Affidavit.
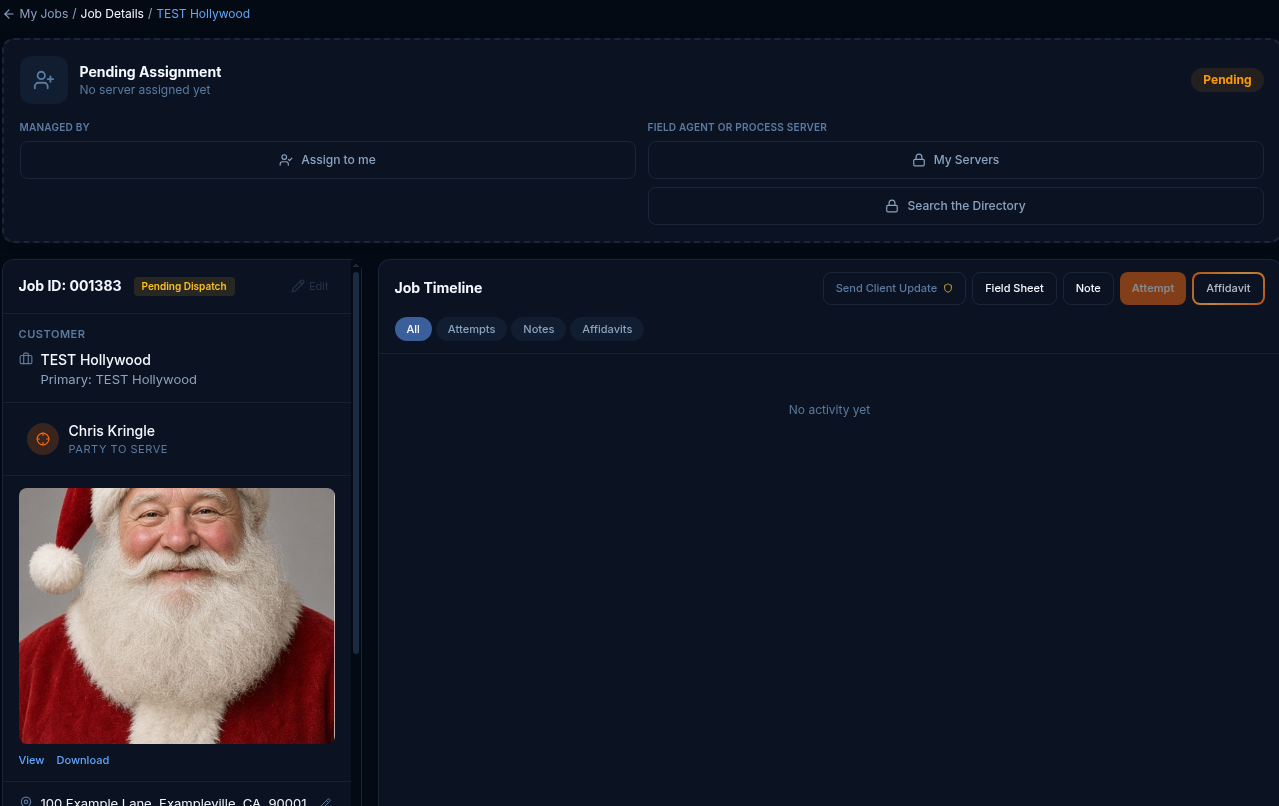
The saved sample job, shown for training only. Do not dispatch or serve this fictional job.
Next step
When service is done, it is time to create your proof of service.
- Next tutorial: How to Generate an Affidavit of Service
- Questions? Visit the Help Center and FAQs or email support@mightyprocessserver.com.